


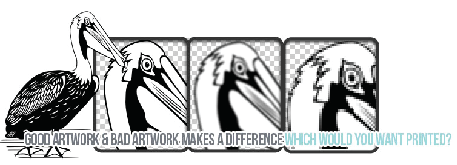
Sending us print ready, vector artwork to our standards is crucial if you want your order printed in the best possible quality and within your required turnaround time. Please follow our Artwork Guideline tutorial to learn the step by step process to ensure you are sending print ready artwork. The most crucial part of artwork is the resolution or DPI. If your artwork is low in resolution, your final product will not be printed to it’s full potential and the print could reflect that. If you are not a graphic artist, you may want to seek the help a professional to take care of this task for you. We offer Graphic Artwork Services at a reasonable rate if needed. While it may not seem feasible to add on more costs, it could be a huge help in the long run. We can help with any aspect of your artwork process whether it is creating it from the start, or manipulating it to be print ready. Having your artwork print ready from the start and before you place your order will help the process run smoothly.
OUR ARTWORK REQUIREMENTS ARE AS FOLLOWS:
Proper Format For Vector Art:
You may send a vector Ai file, a vector EPS file, or a vector PDF file. This must be prepared in true vector format ONLY and in the desired print size. All text must be converted to outline as shown here.
VECTOR FORMAT:


![]()
Vector Ai(Adobe Illustrator) files and Vector PDF files.
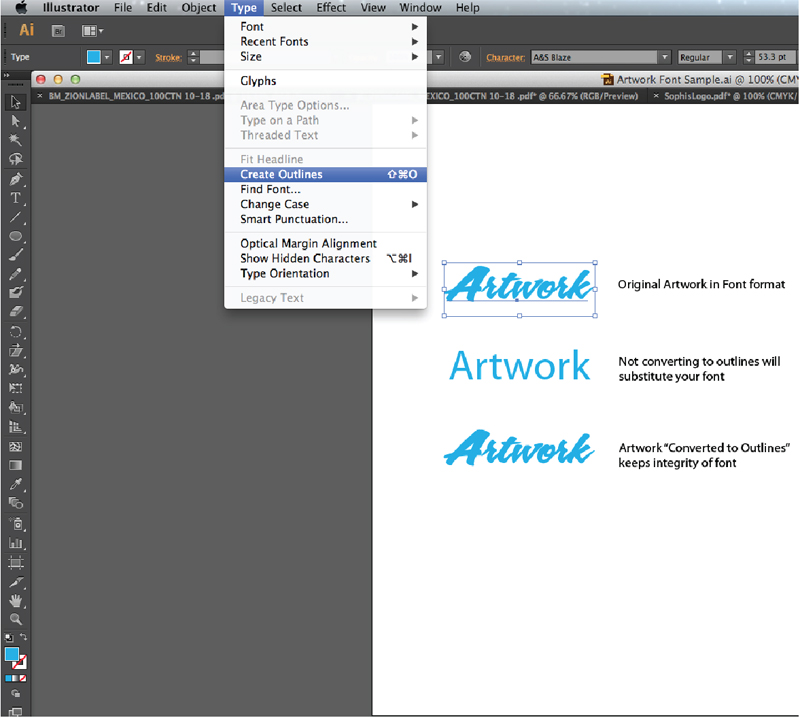
Click on image to view larger
MAKE SURE YOU DO THE FOLLOWING:
It can be a guessing game when a customer sends us their artwork with multiple colors. Please convert the colors in your artwork to spot color and name them according to our color palette on the bottom of this page. If you prefer a PMS color, name the spot color the PMS number. Learn more below.

Click on image to view larger
SPOT COLORS
If your artwork is vector, it’s super easy to convert the process colors in your artwork to a spot color.
Step 1: Select the color you want to convert to a spot color. If you have a lot of elements to select, utilize the select same fill color tool.
Step 2: From the “swatches” window, click the “new swatch” icon.
Step 3: A new window will pop up as seen on the left. For “swatch name”, include the color name. For “color type” select “spot color”. Do the same for every additional color. It’s that easy! For a video tutorial see below.
Video Tutorial
EMBED LINKED FILES
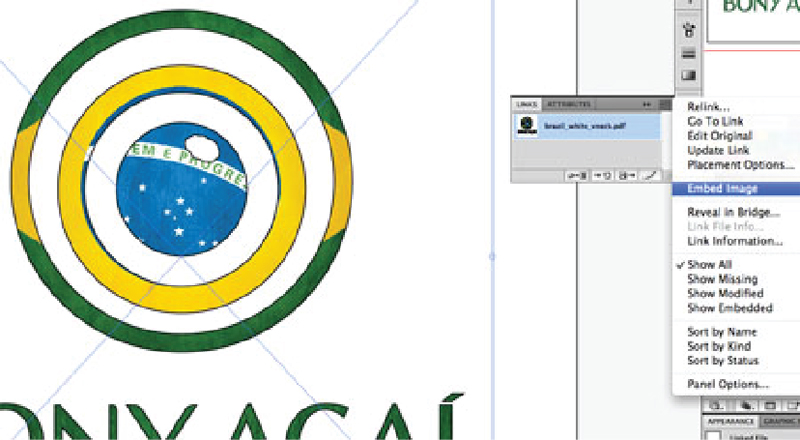
Linked Files are normally used for Simulated Process. Linked artwork remains independent of the art template, which results in a smaller artwork file. The only problem is, we cannot edit the components in the artwork since the original linked file is located on your computer. An easy fix to this is to Embed the Linked Image. If you cannot embed your linked files, please submit them additionally with your art provided. We will contact you if any further questions arise.
As shown to the right, first select your linked file, then under your links panel select “Embed Image”.
Click on image to view larger
Video Tutorial
HALFTONE & BITMAP ARTWORK
Do not halftone or bitmap your artwork/images. We know all the correct settings that are needed to achieve a quality looking print, so please use opacities/gradients and leave the halftone process to us.
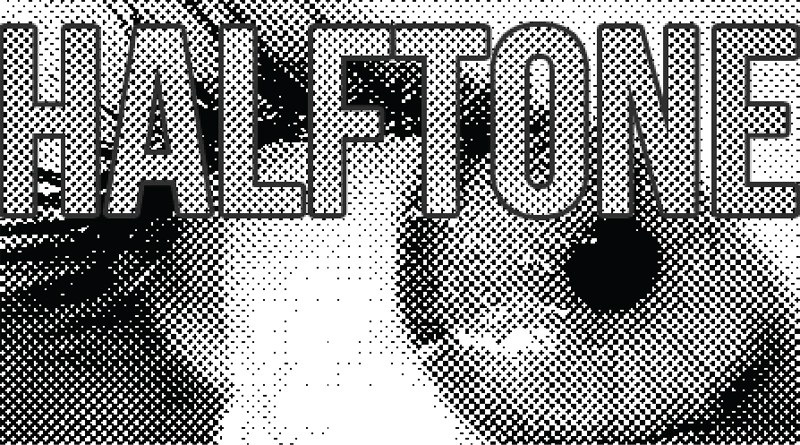
Halftone images usually consist of varying sized dots to make up an image. On the right is an example of what you would see if you looked closely at a black and white picture on a newspaper. Our experienced staff uses high tensioned Newman Screens which require certain LPI frequency and angles etc. This is important, especially with gradient blends, for us to create the halftone needed to get a successful print. We’d rather you use opacities and gradients to achieve the look you’d like and we’ll take care of the rest.
Click on image to view larger